 By
Installing Windows 11 yourself sounds technical, but with a USB drive and an hour of time, anyone can do it. This guide covers both ways: upgrading your current PC while keeping files, and a clean install that starts fresh, whether you’re fixing a slow PC, replacing a drive or building a new computer.
Short answer: to keep your files, run the free Windows 11 Installation Assistant from microsoft.com/software-download/windows11. For a clean install, create a bootable USB with Microsoft’s Media Creation Tool (8 GB+ drive), restart the PC and boot from the USB (usually F12, F11, F9 or Esc at startup), choose your language, click Install now, select Custom: Install Windows only, pick the drive, and follow the setup screens.
Last updated: October 2026.
Upgrade or clean install?
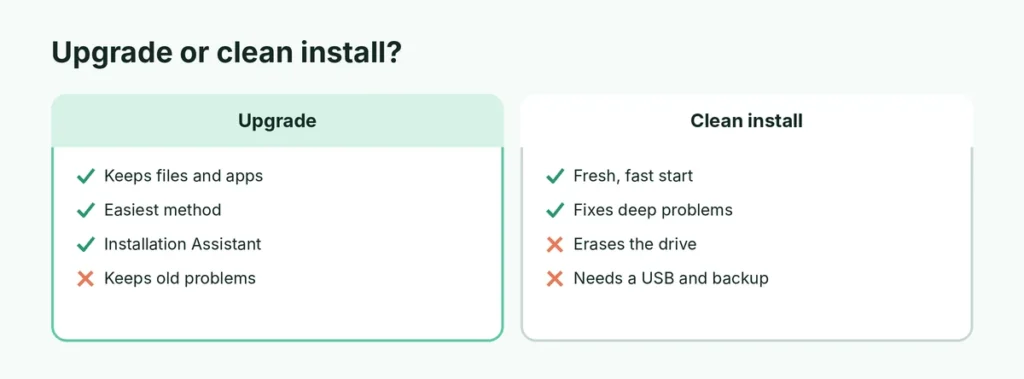
| Upgrade | Clean install | |
|---|---|---|
| Keeps files and apps | ✅ Yes | ❌ No (everything on the drive is erased) |
| Fixes deep problems | Sometimes | ✅ Usually |
| Best for | Moving from Windows 10, getting the latest version | Slow or broken PCs, new drives, new builds, selling a PC |
| Tool | Installation Assistant | Bootable USB |
If you just want Windows 11 on your current PC with everything kept, use the Windows 11 Installation Assistant guide. The rest of this article covers a clean install.
What you need
- A PC that meets the Windows 11 requirements (64-bit supported CPU, 4 GB RAM, 64 GB storage, UEFI with Secure Boot, TPM 2.0). Check with PC Health Check.
- A USB flash drive of at least 8 GB (it will be erased).
- About 1 hour.
- A backup of everything you want to keep.
- Your Windows product key if the PC never had Windows 10/11 activated. PCs that had Windows activated usually reactivate automatically.
- An internet connection (Windows 11 Home setup expects one).
Step 1: Back up your files
A clean install erases the drive you install on. Copy your documents, photos and other files to an external drive or cloud storage, and note any software licenses you’ll need. If you have photos on your phone you want on the PC afterward, here’s how to send photos from iPhone to PC.
Step 2: Create a bootable USB
- On a working Windows PC, go to microsoft.com/software-download/windows11.
- Under Create Windows 11 Installation Media, click Download Now.
- Run the Media Creation Tool, accept the terms, choose language and edition.
- Select USB flash drive, choose your USB drive, and wait.
Prefer the ISO and Rufus? Here’s how to download the Windows 11 ISO and how to make a Windows 11 bootable USB in detail.
Step 3: Boot from the USB
- Plug the USB into the PC you’re installing on.
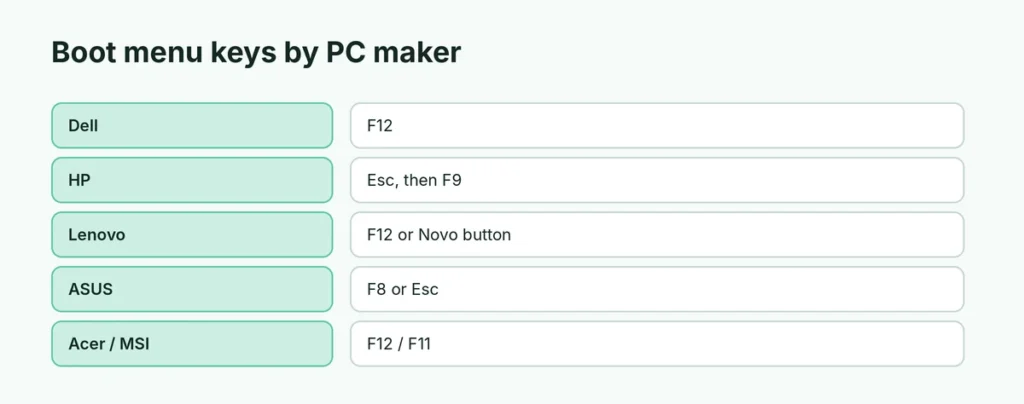
- Restart and press the boot menu key as soon as the PC turns on:
| PC maker | Boot menu key (common) |
|---|---|
| Dell | F12 |
| HP | Esc, then F9 |
| Lenovo | F12 (or the Novo button) |
| ASUS | F8 or Esc |
| Acer | F12 |
| MSI | F11 |
| Custom desktops | F8, F11 or F12 depending on motherboard |
- Choose the USB drive (often labeled UEFI: [USB name]).
Can’t get to the boot menu? From Windows, go to Settings → System → Recovery → Advanced startup → Restart now → Use a device → choose the USB. For laptops that won’t even turn on properly, here’s help for how to turn on a Lenovo laptop that won’t start.
Step 4: Install Windows 11
- Choose your language, time format and keyboard, then Next.
- Click Install Windows 11 (or Install now) and agree to keep going.
- Product key: enter it, or click I don’t have a product key if the PC had Windows activated before.
- Choose the edition that matches your license (Home or Pro). Unsure? See Windows 11 Home vs Pro.
- Accept the license terms.
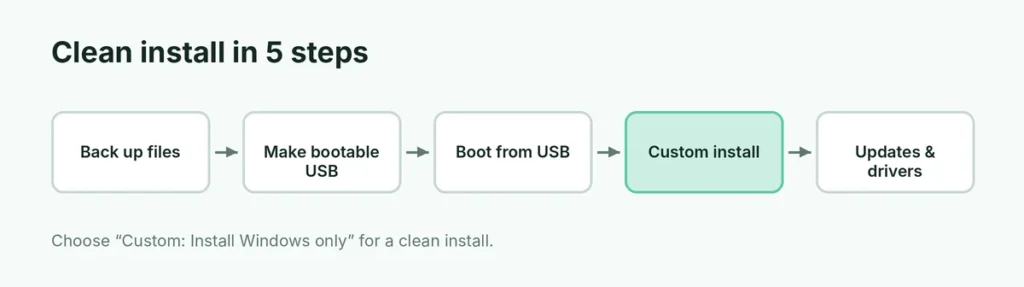
- Choose Custom: Install Windows only (advanced) for a clean install.
- Select the drive:
- To wipe everything, delete the partitions on your main drive (usually Drive 0) until it shows Unallocated Space, select it and click Next.
- Be careful not to delete partitions on other drives with your data.
- Windows copies files and restarts several times. Remove the USB when it first restarts if the PC keeps booting back into setup.
Step 5: Set up Windows 11
After installation, the setup screens ask you to:
- Choose your country/region and keyboard.
- Connect to Wi-Fi or Ethernet. If there’s no Wi-Fi driver, connect with a cable or skip and install drivers later.
- Sign in with a Microsoft account (Windows 11 Home requires one during normal setup).
- Set up a PIN and choose privacy settings (turning off optional diagnostics and ad tracking is fine).
- Restore from OneDrive backup or set up as new.
Step 6: After installing
- Windows Update: Settings → Windows Update → Check for updates, and install everything, including optional driver updates.
- Drivers: download chipset, graphics, Wi-Fi and audio drivers from your PC maker’s support site if anything doesn’t work.
- Activation: check Settings → System → Activation. It should say Windows is activated.
- Restore your files from your backup.
- Install your apps again from the Microsoft Store or official websites.
Common installation problems
| Problem | Fix |
|---|---|
| “This PC can’t run Windows 11” | Turn on TPM 2.0 and Secure Boot in BIOS/UEFI; check the CPU is supported |
| USB doesn’t appear in boot menu | Re-create the USB, use another port (USB 2.0 on older PCs), set boot mode to UEFI |
| No drives shown during setup | Load storage drivers (Intel RST/VMD) from your PC maker, or switch SATA mode in BIOS |
| Stuck on a logo after restart | Wait 20 minutes; then remove the USB and restart |
| Not activated | Make sure you installed the same edition (Home/Pro) as your license; use Troubleshoot in Activation settings |
Install Windows 11 on a new PC you built
For a new build with an empty drive:
- Make sure the motherboard’s TPM (fTPM/PTT) and Secure Boot are enabled in UEFI settings.
- Boot from the USB and choose Custom install.
- Select the Unallocated Space on your new drive and click Next. Windows creates the partitions automatically.
- Enter your product key when asked, or skip and activate later.
- Install motherboard drivers (chipset, LAN/Wi-Fi, audio) from the motherboard maker’s website, then graphics drivers from NVIDIA, AMD or Intel.
Reinstall Windows 11 without a USB
If your PC already runs Windows 11 and you just want a fresh start, you don’t need a USB:
- Settings → System → Recovery → Reset this PC → Remove everything → Cloud download.
This downloads a fresh copy of Windows 11 and reinstalls it. It’s the easiest “clean install” for most people. Choose Keep my files if you only want to reset apps and settings.
Set up Windows 11 with a local account
Windows 11 Home normally requires a Microsoft account and internet during setup. Microsoft has been removing workarounds for local accounts. Using a Microsoft account has benefits (OneDrive backup, BitLocker recovery key stored online, easy app reinstalls), and you can still use a simple PIN to sign in. Pro offers more setup options for work and school accounts.
How long does it take?
Usually 30 to 60 minutes for the installation itself on an SSD, plus time for updates and drivers. Older PCs with hard drives can take longer.
The short version
To keep your files, upgrade with the Installation Assistant. For a fresh start, back up first, make a bootable USB with the Media Creation Tool, boot from it with your PC’s boot menu key, choose Custom: Install Windows only, select (and if needed clear) your main drive, and follow the setup screens. Then run Windows Update, install drivers and check activation.