Nothing is more frustrating in Free Fire than spotting an enemy first, pulling the trigger, and missing those critical headshots just because your aim slides off. No matter how fast your movement speed is, connecting auto headshots consistently is nearly impossible without the right sensitivity settings.
To help you fix your aim, we tested various sensitivity configurations across different Android and iOS devices (ranging from 2GB to 8GB+ RAM). We analyzed recoil patterns, drag speed, and touch response to bring you the ultimate, battle-tested Free Fire sensitivity settings for 2026.
Why Do Sensitivity Settings Matter for Auto Headshots?
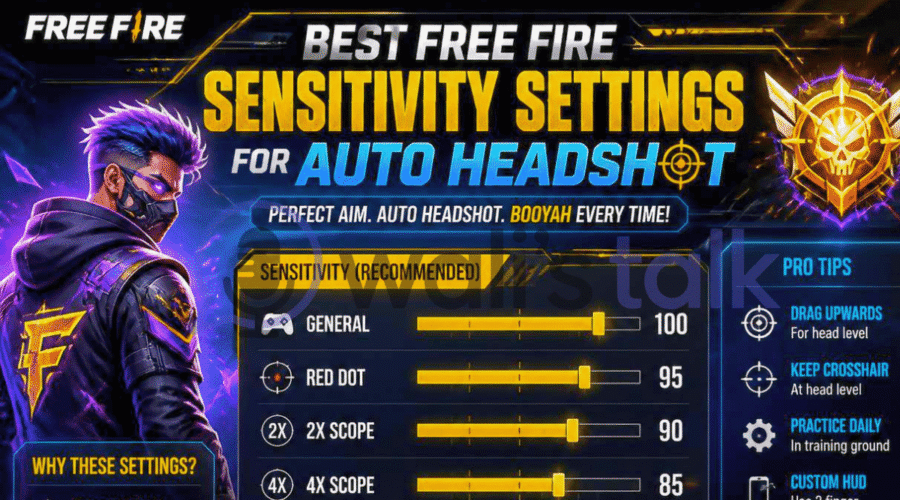
Default sensitivity settings in Free Fire are often too slow for quick crosshair adjustments. The core secret to landing auto headshots is snapping your crosshair from the enemy’s torso straight to their head in milliseconds.
Optimized sensitivity settings increase your screen’s touch responsiveness, allowing your fire button drag to register smoothly without overshooting or getting stuck on the chest.
Best Free Fire Sensitivity Settings for Low-End Devices (2GB – 4GB RAM)
Budget or older smartphones naturally have lower display refresh rates and slower touch sampling. To compensate for this hardware limitation, you need to keep your general sensitivity values near maximum:
| Setting Name | Recommended Value |
| General | 95 – 100 |
| Red Dot | 90 – 95 |
| 2x Scope | 85 – 90 |
| 4x Scope | 80 – 85 |
| Sniper Scope | 50 – 60 |
| Free Look | 70 – 75 |
(Pro Tip: If your device experiences severe lag or frame drops, keep the General sensitivity locked at 100 to maximize swipe speed.)
Best Sensitivity Settings for High-End Devices (6GB – 8GB+ RAM)
Flagship smartphones come equipped with high refresh rate displays (90Hz – 120Hz+) and extremely responsive touch screens. Setting your sensitivity to 100 on these devices can cause your aim to over-drag past the enemy’s head. Use these balanced settings instead:
| Setting Name | Recommended Value |
| General | 85 – 90 |
| Red Dot | 80 – 85 |
| 2x Scope | 75 – 80 |
| 4x Scope | 70 – 75 |
| Sniper Scope | 45 – 50 |
| Free Look | 65 – 70 |
Pro Tips to Improve Your Headshot Accuracy
Tweaking your settings is only half the battle. To turn these numbers into killstreaks, integrate these quick mechanical tips into your gameplay:
Train Muscle Memory: Avoid jumping straight into Ranked matches after changing settings. Spend at least 20–30 minutes in the Training Ground to let your muscle memory adjust to the new touch sensitivity.
Optimize Your Custom HUD: Set your Fire Button size between 40% and 50%. Position it slightly lower on your screen to leave ample thumb room for upward dragging.
Master the Drag Technique: When firing, keep your movement joystick still for a fraction of a second and flick your fire button straight up toward the enemy’s head.
Frequently Asked Questions (FAQs)
1. Will using custom sensitivity settings get my Free Fire account banned? No. Adjusting in-game sensitivity is an official feature provided by Garena. It does not violate any terms of service, nor does it use third-party scripts or hacks.
2. What is the best DPI setting for Free Fire? It is safest to stick with your phone’s default DPI. However, if you want extra swipe agility, you can increase your default DPI by 50 to 100 points max. Going higher may cause battery strain or display glitching.
3. Do these sensitivity settings work for Free Fire MAX? Yes, these exact configurations apply seamlessly to both standard Free Fire and Free Fire MAX.
What smartphone model and RAM variant are you currently gaming on? Try these settings out and drop a comment below with your updated headshot rate!